






CD Cover Size Specifications for Printing: Complete Size Guide
November 11, 2026 Explore Blogs
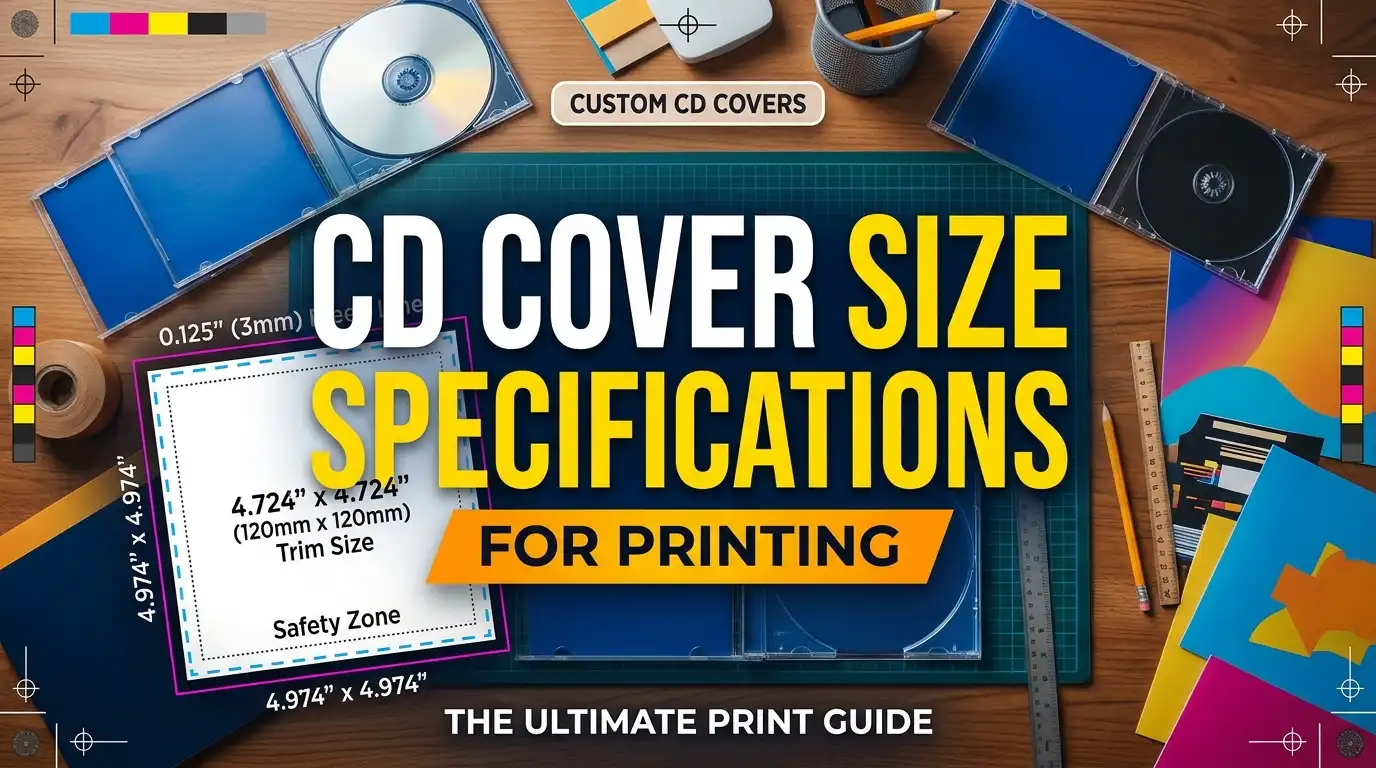
The CD cover size specifications for printing depend on the package you choose. For a standard jewel case, the front insert is a square of about 4.75 × 4.75 inches (120.65 mm). Some metric templates use 120 × 120 mm (4.72 inches) instead. That small gap matters. A file built on the wrong template can leave white edges or trim away text.
This guide puts every CD cover dimensions figure in one place. You will find sizes in inches and millimeters, pixel counts at 300 DPI, bleed and safe-zone rules, and a short artwork checklist. We also compare jewel cases, slimline cases and Digipaks.
First, a note on sources. Printers trim their inserts slightly differently. For that reason, we name the manufacturer behind each number and flag where the figures differ. Before you start designing, always download the current template from your printer.
What Is the Standard CD Cover Size?
The standard CD cover size is a square front insert of about 4.75 × 4.75 inches (120.65 mm) at most US printers. Metric references list 120 × 120 mm (4.72 inches). Both fit a standard jewel case. However, the printer’s template decides the final trim size.
Standard CD Front Cover Dimensions
The front cover is the first page of the booklet that slides under the clips of the jewel case. Disc Makers states that this front cover is typically 4.724 × 4.724 inches, or 120 × 120 mm. Its separate cover-size guide, however, lists the jewel case insert at 4.75 × 4.75 inches. 4OVER4 also trims its CD jewel case insert size at 4.75 × 4.75 inches.
In short, both numbers appear in real production documents. Because of this, do not treat them as exact twins. Pick one template and build everything on it.
CD Cover Size in Inches and MM
| Source | Front insert (inches) | Front insert (mm) |
|---|---|---|
| Disc Makers, cover dimensions page | 4.724 × 4.724 | 120 × 120 |
| Disc Makers, album cover size guide | 4.75 × 4.75 | 120.65 × 120.65 |
| 4OVER4 CD covers | 4.75 × 4.75 | 120.65 × 120.65 |
These are finished (trim) sizes. They do not include bleed. We cover bleed later in this guide, and we convert each size to pixels in the 300 DPI section.
One more point helps avoid mistakes. The paper insert and the plastic case are different things. The insert is the printed paper. The case is the container that holds it, so their dimensions are not interchangeable.
Need professionally printed CD covers? Explore our custom printing services and send us your project details.
Standard CD Jewel Case Dimensions
A standard jewel case holds three printed parts: the front insert, the back tray card, and the disc itself. Each part has its own size. The table below lists the CD jewel case dimensions that matter for printing.
| Component | Inches | Millimeters | Source |
|---|---|---|---|
| Front insert (trim) | 4.75 × 4.75 | 120.65 × 120.65 | Disc Makers, 4OVER4 |
| Full tray card, spines included | 5.9 × 4.625 | 149.9 × 117.5 | 4OVER4 |
| Tray card back panel | 5.4 × 4.625 | 137.2 × 117.5 | Disc Makers |
| Each spine strip | 0.25 × 4.625 | 6.35 × 117.5 | Disc Makers |
| Plastic case (W × H × D) | 5.59 × 4.92 × 0.39 | 142 × 125 × 10 | Common industry reference |
Physical Jewel Case Measurements
The plastic case measures roughly 142 × 125 × 10 mm. This size tells you how much shelf space or shipping room you need. It does not tell you how large the artwork should be. The printed insert is smaller than the case, so never use the case size as an artwork size.
Front Insert Dimensions
The front insert is the square cover described above. At US printers, it trims to 4.75 × 4.75 inches. If your booklet has more pages, this square is simply the first page.
Back Tray Card Dimensions
The back tray card sits under the disc tray. Its flat size is about 5.9 × 4.625 inches at 4OVER4. A metric reference from RonyaSoft lists 151 × 118 mm (5.94 × 4.65 inches). These values agree closely, but they are not identical. So, check your template before you place any text near an edge.
The tray card has three zones: a center back panel and two folded spine strips. Disc Makers lists the back panel at 5.4 × 4.625 inches. Each spine adds 0.25 inches. Add them up, and the total matches the full width of about 5.9 inches.
CD Spine Measurements
Each spine strip is about 0.25 inches wide. The two spines are the outer edges of the tray card, not a separate piece. Kunaki confirms this in its FAQ. In addition, 4OVER4 describes the folded tabs as the place for vertical titles.
For that reason, keep spine text short. Use a large, bold font. Rotate it so it reads along the edge of the case. Finally, leave a small gap between the text and each fold line.
Explore custom CD packaging options if you want help matching your artwork to the right case.
CD Booklet Printing Dimensions
A CD booklet size starts with the same 4.75-inch panel as the front insert. Each extra panel adds another 4.75 inches to the flat width. 4OVER4 lists CD cover sizes from a single 4.75 × 4.75-inch panel up to a 4.75 × 19-inch four-panel booklet.
Single-Page Booklet Size
A single page is the simplest option. It measures 4.75 × 4.75 inches and works well for a basic front cover. Some automated services keep things this simple. For example, Kunaki offers only two-panel inserts (one sheet, front and back) for its jewel cases.
Multi-Page Booklet Layout
Longer booklets use one flat sheet that folds into several panels. The sizes below follow the 4.75-inch panel width and the 4OVER4 range.
| Layout | Flat size (inches) | Flat size (mm) | Folds |
|---|---|---|---|
| 1 panel | 4.75 × 4.75 | 120.65 × 120.65 | None |
| 2 panels | 9.5 × 4.75 | 241.3 × 120.65 | 1 |
| 3 panels | 14.25 × 4.75 | 361.95 × 120.65 | 2 |
| 4 panels | 19 × 4.75 | 482.6 × 120.65 | 3 |
The 2-, 3- and 4-panel rows are our calculations from the 4.75-inch panel. Confirm each one against your printer’s template before you build the file.
Booklet Folding and Binding
Because a booklet folds, it needs more care than a flat card. Follow these rules:
- Place folds exactly on the panel boundaries, every 4.75 inches.
- Keep faces, logos and track titles away from the fold.
- Choose a thin paper. 4OVER4 prints its CD covers on 100# gloss text, which folds easily and slides under the case clips.
- Check the page order on the printer’s template, because inner pages often run in a different order than the finished booklet.
In addition, plan the story of your booklet. Put the credits on the inside panels and the track list on the back.
CD Cover Sizes for Different Packaging Types
CD packaging sizes change with the format. A jewel case, a slimline case and a Digipak each need a different template. Using the wrong one is a common reason for rejected files.
| Package | Main artwork size (inches) | Main artwork size (mm) | Best for |
|---|---|---|---|
| Standard jewel case | 4.75 × 4.75 front insert | 120.65 × 120.65 | Albums with booklets |
| Slimline case | 5.4375 × 4.625 tray card | 138.1 × 117.5 | Thin, lightweight releases |
| Digipak panel | 5.492 × 4.941 | 139.5 × 125.5 | Premium album packaging |
| CD sleeve | About 5 × 5 | About 127 × 127 | Singles and promo discs |
The slimline and sleeve rows are common printer values. Confirm them against your own template.
Standard Jewel Cases
Jewel cases use a paper insert behind a clear front lid. Disc Makers notes that the front page of the insert acts as the album cover. This format is predictable, and almost every printer supports it.
Slimline CD Cases
Slimline cases are about half as thick as a standard case, near 5 mm instead of 10 mm. As a result, the tray card is narrower because it has no deep spines. Use the slimline template, and do not shrink a standard tray card to fit.
CD Digipak Packaging
A Digipak is a cardboard package with a plastic tray for the disc. Disc Makers lists the standard front and back panel at 5.492 × 4.941 inches. It also offers 4-panel, 6-panel and 8-panel layouts. Therefore, a Digipak artwork file is a full flat spread. It is not a single square.
Compared with a jewel case, a Digipak gives you more room for artwork and liner notes. In exchange, it usually costs more and needs a more detailed template.
CD Sleeves and Eco-Wallets
Sleeves and wallets hold the disc in folded paper. 4OVER4 prints 5 × 5 inch CD sleeves, for example. Sizes and fold positions vary between printers. For this reason, always request the die-line from the printer before you design.
Explore our custom printed sleeves and packaging if your project needs something other than a jewel case.
CD Cover Size in Pixels at 300 DPI
To find the CD cover size in pixels, multiply each inch measurement by 300. This gives the minimum pixel size for sharp print at 300 DPI.
\text{Pixels} = \text{Inches} \times 300For example, a 4.75-inch edge becomes 4.75 × 300 = 1,425 pixels.
| Artwork | Size (inches) | Pixels at 300 DPI |
|---|---|---|
| Front insert, metric template | 4.724 × 4.724 | 1,417 × 1,417 |
| Front insert, US template | 4.75 × 4.75 | 1,425 × 1,425 |
| Front insert with 0.125 in bleed | 5 × 5 | 1,500 × 1,500 |
| Full tray card, spines included | 5.9 × 4.625 | 1,770 × 1,388 |
| Full tray card with bleed | 6.15 × 4.875 | 1,845 × 1,463 |
| Slimline tray card | 5.4375 × 4.625 | 1,631 × 1,388 |
| Digipak front or back panel | 5.492 × 4.941 | 1,648 × 1,482 |
These figures are rounded to whole pixels. Your printer’s template gives the final numbers.
DPI and PPI: What Is the Difference?
PPI counts the pixels in an image for each inch. DPI counts the dots a printer places for each inch. In practice, people use both terms for the same setting. Set your canvas to 300 pixels per inch from the start. Pure Music, a CD manufacturer, also advises a minimum of 300 PPI when you open a template in Photoshop.
Resizing later does not help. If you stretch a small image, the file gets bigger, but the detail does not improve. As a result, the print looks soft. Start with a large, sharp image instead.
CD Cover Printing Requirements
CD cover printing specifications cover more than size. Printers also set rules for bleed, margins, color and file type. Meeting all of them keeps your order moving.
Bleed and Trim Specifications
Three terms explain most layout problems:
- Bleed: extra artwork that runs past the cutting edge.
- Trim: the final size after the paper is cut.
- Safe zone: the inner area where text and logos stay protected.
Because cutting is never perfect, bleed hides tiny shifts. 4OVER4 advises adding 0.125 inches of bleed on every edge of a CD insert. For a 4.75-inch insert, that makes a 5 × 5-inch canvas (1,500 × 1,500 pixels at 300 DPI).
Safe Margins
Keep all important text and logos inside the safe zone. A margin of 0.125 to 0.25 inches from the trim edge is a common guide. Disc Makers explains that skipping safe margins risks cutting off key design elements. However, the exact margin differs by printer, so use the guides on your template.
Color Mode and Resolution
Use 300 DPI for every image. For color, ask your printer which mode it wants. Commercial presses usually print in CMYK. 4OVER4, for example, prints full-color CMYK. On the other hand, some automated services take simple JPG files. Kunaki accepts JPG and JPEG artwork.
RGB screens show brighter colors than CMYK ink can print. So, if you design in RGB, expect some colors to look duller on paper. Convert early and check the result.
Print-Ready File Formats
Most printers prefer a flattened PDF. 4OVER4 advises that you outline or embed fonts, include bleed, and export a single PDF. Pure Music supplies PDF and InDesign templates that open in Photoshop and Illustrator. Finally, remove any blue template guides from the print area before you export.
How to Prepare CD Cover Artwork for Printing
Follow these steps to build a file that prints correctly the first time.
- Pick your package. Decide between a jewel case, slimline case, Digipak or sleeve before you design anything.
- Download the printer’s template. Use the exact file for your package and printer. Disc Makers templates, for example, already include bleed, trim and safe-area guides.
- Set up the canvas. Open the template at 300 PPI. Make sure the canvas includes the bleed area.
- Place your artwork. Extend backgrounds into the bleed. Keep text, faces and logos inside the safe zone.
- Add spine text. Put short, rotated titles inside each 0.25-inch spine strip, away from the folds.
- Check the color mode. Convert to CMYK if your printer asks for it.
- Prepare the file. Outline or embed fonts, flatten transparency, and delete the template guides from the print area.
- Export and review. Save a single PDF with bleed, or the file type your printer requests. Then approve the digital proof before printing. 4OVER4 offers a free digital proof with its CD covers.
Get your artwork print-ready. Contact us to discuss your artwork and custom booklet printing.
Common CD Cover Printing Mistakes
Most rejected files fail for a handful of reasons. Each one is easy to prevent.
- Artwork does not fit the case. The designer used the case size, not the insert size. Fix: start from the printer’s insert template.
- Front and back sizes are mixed up. The front is a square. The tray card is a wider rectangle with two spines. Fix: label each layer in your file.
- Spine text sits in the wrong place. Text drifts across a fold. Fix: keep it inside the 0.25-inch strip with a small gap on each side.
- Low-resolution images. A 72 DPI web image prints soft. Fix: use 300 PPI at final size.
- Text gets trimmed. Important words sit too close to the edge. Fix: keep a 0.125 to 0.25-inch safe margin.
- Unexpected colors. RGB files shift when converted. Fix: confirm the color mode and review the proof.
- Wrong template for the package. A slimline or Digipak file built on a jewel case template will not fit. Fix: download the template that matches your package.
Professional Custom CD Cover Printing
Home printing works for a handful of discs. For larger runs, custom CD cover printing gives cleaner edges, accurate color and consistent folds. It also saves you hours of cutting.
When you request a quote, have these details ready:
- Package type: jewel case, slimline case, Digipak or sleeve.
- Quantity: the number of discs and printed inserts.
- Booklet pages: a single front cover or a multi-panel booklet.
- Paper and finish: gloss or matte, and the paper weight.
- Artwork status: finished print-ready files, or a draft that needs adjusting.
Paper choice affects how the booklet feels and folds. For example, a thin coated stock folds easily, while a heavier card stock feels more premium. Ask for a sample if the finish matters to your release.
You can also pair your inserts with custom printed packaging that matches the artwork on your discs. Matching the design across the cover, the tray card and the outer packaging gives your release a polished look.
Ready to print? Request a custom printing quote and share your package type, quantity and artwork.
Frequently Asked Questions About CD Cover Sizes
What is the standard CD cover size in inches?
At US printers, the front insert is 4.75 × 4.75 inches. Metric templates list 120 × 120 mm, which is 4.724 inches. Both are square and fit a standard jewel case. Use the exact number from your printer’s template.
What are the dimensions of a standard CD jewel case?
The plastic case measures about 142 × 125 × 10 mm (5.59 × 4.92 × 0.39 inches). This is the size of the container, not the artwork. The printed insert is smaller.
What size should a CD cover be in pixels?
At 300 DPI, a 4.75-inch front insert needs 1,425 × 1,425 pixels. With 0.125 inches of bleed on each edge, the canvas becomes 5 × 5 inches, or 1,500 × 1,500 pixels.
What is the standard CD booklet size?
Each booklet panel measures 4.75 × 4.75 inches. Extra panels add 4.75 inches to the flat width. 4OVER4 lists sizes up to a 4.75 × 19-inch four-panel layout.
What are CD tray card dimensions?
A full tray card is about 5.9 × 4.625 inches at 4OVER4. That total includes two 0.25-inch spine strips. The center back panel is about 5.4 × 4.625 inches.
What is the difference between a CD front cover and back cover?
The front cover is a square insert on the booklet. The back cover is the tray card. It is wider than the front and includes the two spines.
How wide are CD case spines?
Each spine strip is about 0.25 inches (6.35 mm) wide. The spines are the two outer edges of the tray card, so they fold at the sides of the case.
What resolution should I use for CD cover printing?
Use 300 DPI at final size. Lower resolution can look soft or pixelated on paper. Do not enlarge a small image to reach 300 DPI.
How much bleed is required for CD cover artwork?
4OVER4 advises 0.125 inches of bleed on every edge. Other printers may differ, so check the bleed value in your template first.
What is the difference between a jewel case and a Digipak?
A jewel case is a plastic case with a paper insert. A Digipak is a cardboard package with a plastic tray. Disc Makers lists the standard Digipak panel at 5.492 × 4.941 inches.
What size is a slimline CD case insert?
A slimline tray card is commonly listed at 5.4375 × 4.625 inches. Because printers vary, confirm this value against the slimline template before you design.
Can I print CD covers using a regular printer?
Yes, for small runs. Download a template, set the file to 300 DPI, and print on good paper. Then trim along the lines with a ruler and blade. Home printers cannot print to the edge on most models, so expect small margins.
Which file format is best for CD cover printing?
A flattened PDF with outlined or embedded fonts and bleed is the safest choice. Some automated services accept JPG files instead. Always follow the printer’s instructions.
Should CD cover artwork be RGB or CMYK?
Ask your printer first. Commercial presses usually print in CMYK. If you design in RGB, convert early and review the proof for color shifts.
Where can I get a CD cover printing template?
Most manufacturers offer free templates on their websites. Disc Makers, 4OVER4 and Pure Music all provide them. Choose the template that matches your package and your printer.
Conclusion
The CD cover size specifications for printing come down to a few key numbers. A jewel case front insert trims to 4.75 × 4.75 inches at US printers, or 120 × 120 mm in metric templates. The tray card measures about 5.9 × 4.625 inches with two 0.25-inch spines. At 300 DPI, a front insert needs 1,425 × 1,425 pixels, or 1,500 × 1,500 with bleed.
Because printers differ slightly, the template always wins. Download it, build inside the safe zone, and review the proof. Doing so avoids cut-off text, soft images and wasted discs.
If you want expert help, contact our team for custom CD cover printing that matches your artwork and your packaging.